
Home » Posts Page » Blog » Products and Materials » How to Install and Remove a Container Liner Correctly
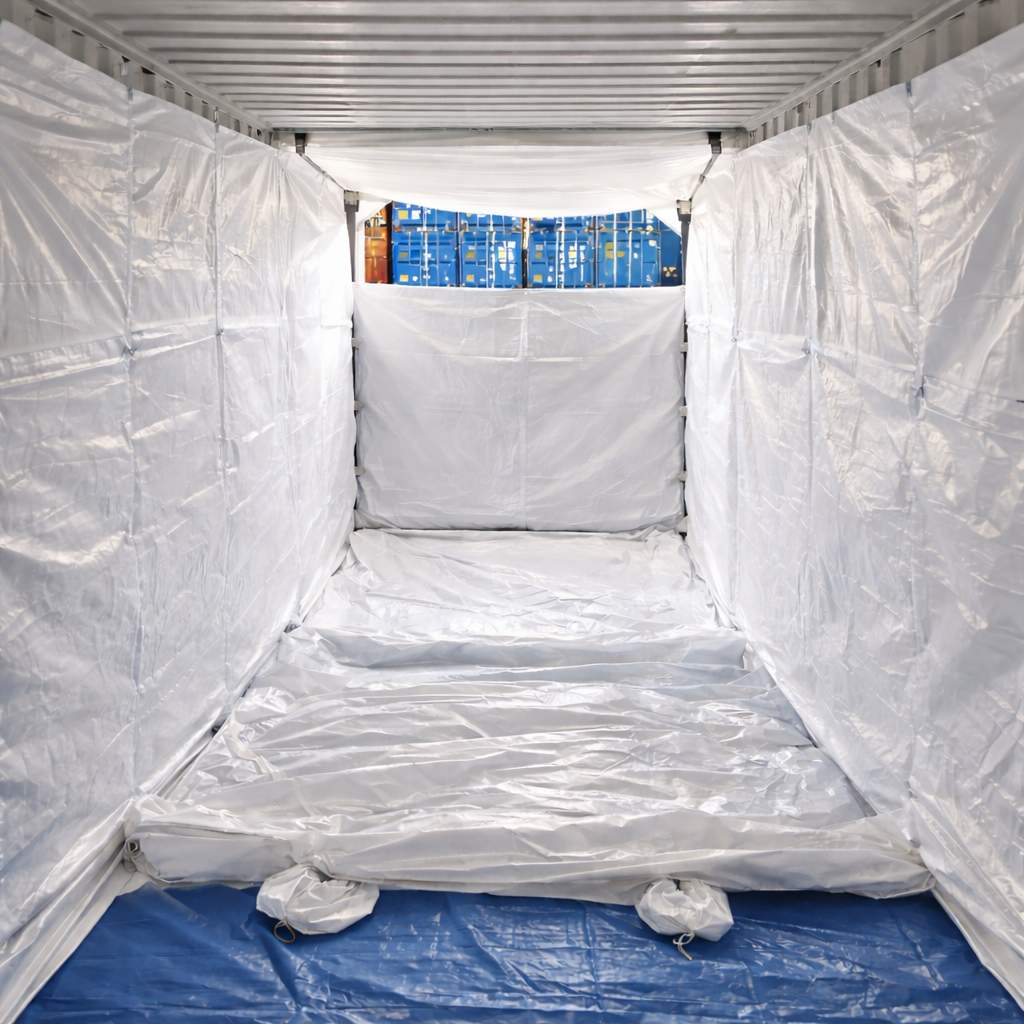
The container check is the step most teams skip when running behind schedule, and the one most directly responsible for liner failures that look like product problems.
Start with cleanliness. Residue from previous cargo, chemical powder, grain dust, and mineral particles can contaminate the new shipment through liner seams or spout openings. If you detect chemical odor, visible staining, or pest evidence, clean the container before the liner goes in.
Check the floor and walls for sharp protrusions. Protruding nail heads, rough weld points, and jagged rust patches all represent puncture risks. The liner sits directly on the container floor under full product load. A sharp edge that would barely scratch your hand will tear the liner fabric under several hundred kilograms of pressure. Run a gloved hand along the floor seams before unfolding the liner.
Confirm the interior is dry, and check that D-rings and lashing points are present and undamaged. A bent D-ring that looks acceptable under light inspection can fail under load. This check takes two minutes; discovering a problem after the liner is installed and the container is half-loaded costs considerably more. For more on how container preparation affects overall turnaround, the guide on how container liners reduce cleaning and turnaround time covers the downstream impact.
For a conventional bar-based liner, two people are the practical standard. One feeds the liner into the container and positions it against the rear wall while the other manages the fabric at the door. Once positioned, one person holds anchor points while the other secures them. Threading steel bracing bars through their sleeves with one pair of hands creates alignment errors that compound during filling, rear corners not fully seated, anchor points under tension, and bars threaded unevenly.
Barless linear systems change this. Codefine’s Bulksaver® is a patented design that eliminates the steel bracing bar system entirely. Single-person installation is practical, setup time drops to 15 to 20 minutes, and there is no lashing equipment to manage.
The sequence below covers conventional bar-based installation. Barless installation follows the same logic, positioning, anchoring, and checking, without the bar steps.
Step 1: Orient the liner before entering the container. Unfold it at the container entrance, identify the loading spout, and confirm the liner is correctly oriented before bringing it inside. Rotating a misoriented liner inside a 40-foot container is significantly harder than getting the orientation right at the door.
Step 2: Feed the liner to the rear wall. Pull the liner fully toward the rear. The back corners should reach the rear wall without bunching. If the liner falls short by even 30 centimetres, it will pull forward under product weight during filling, stressing the anchor points and creating uneven load distribution.
Step 3: Secure the rear anchor points first. The rear corners carry the most load during filling. Attach them to the D-rings before any other anchor point. Loose rear anchors allow the liner to shift as product fills the back. Once the liner starts moving under load, you cannot correct it without emptying the container.
Step 4: Install the bracing bars. Steel bars run horizontally through sleeves in the liner fabric to hold it open during filling, so the product distributes evenly across the full container width. Bar placement should match the manufacturer’s specifications. Thread each bar through its sleeve from the same end so they sit parallel, then secure both ends to the container walls.
Step 5: Secure remaining anchor points from rear to front. Each anchor point should lie flat against the liner fabric without pulling it off-centre. If an anchor point requires force to reach its D-ring, the liner is misaligned; adjust the fabric before securing rather than pulling the anchor to compensate.
Step 6: Check the liner before loading. Press the walls. They should be taut and evenly tensioned from rear to front. Slack fabric means an anchor point is not holding or a bar is misaligned. Correct it now, once the product weight is in the liner, the installation is fixed for that shipment.
Most in-transit liner failures trace back to one of four errors at installation.
Skipped rear anchoring. The liner slides toward the door as product fills the back. The rear fabric bunches under the product, seams take on lateral stress they were not designed for, and discharge becomes uneven. By the time the problem is visible at the destination, the damage is already done.
Loose or misplaced bracing bars. The liner collapses inward as product loads into the centre, creating a narrow heap rather than an even fill across the container width. Dense and fine-powder products are particularly sensitive to this; the discharge spout bridges easily on a misshapen liner.
Installing on an unprepared floor. A nail head or sharp weld point that does not puncture the liner immediately may work through the fabric over a multi-week ocean voyage. Product loss at the port of destination is not a liner material failure; it is a floor inspection that did not happen at origin.
Filling all anchor points before is secured. Once the product weight is in the liner, any unsecured anchor point becomes inaccessible. The liner finishes the voyage in whatever configuration it was in when filling began. Understanding polyethylene liner construction helps clarify how the material performs under correctly applied load. The fabric handles the pressure, but only when the installation distributes it properly.
Before opening the discharge spout, confirm that the receiving equipment is in position. Opening the spout on a liner under partial load without equipment in place creates an uncontrolled flow.
Open the spout gradually. For products prone to bridging, widen the spout opening rather than striking the liner; striking it under load stresses the bottom seams and can release product across the container floor.
Once discharge is complete, release anchor points from rear to front. Fold the liner toward the door as you go, keeping residue inside the folds. Pull the folded liner out without dragging it across the floor. With the liner out, inspect the container interior. Residue on the walls or floor points to a seam failure, spout seal issue, or anchor point failure. The answer tells you whether the next liner needs a different spec or the installation process needs adjustment. The breakdown of how this affects container turnaround time is worth reading for operations managing multiple product cycles.
The answer depends on the liner type and what it carried. Single-use liners, the standard for food-grade, pharmaceutical, and chemical cargo, should not be reused regardless of visible condition. A liner that carried a pesticide powder and looks clean after discharge may still carry trace residue in the fabric weave. The liner cost is small relative to the liability of a contaminated shipment.
Heavy-duty reusable liners can go back into service if the post-use inspection passes: no seam tears, no anchor failures, no product penetration through the fabric. Clean by sweeping out debris, washing with mild detergent, and drying completely before storage. A liner stored damply will develop mold that contaminates the next shipment. The advantages of container liner bags guide covers the cost comparison between single-use and reusable options.
Do I need two people to install a container liner? For bar-based liners, two people is the practical standard. Codefine’s Bulksaver® barless system is designed for single-person installation.
How long does container liner installation take? A bar-based liner takes 30 to 45 minutes. Barless systems reduce this to 15 to 20 minutes. Add time if the container needs cleaning before setup.
Why is my container liner collapsing during filling? Loose rear anchor points and bracing bars that are missing or misplaced are the most common causes. All anchor points should be secured and all bars positioned per manufacturer specification before filling begins.
Can I install a container liner without metal bars? Yes. Codefine’s Bulksaver® is a patented barless design for 20-foot and 40-foot containers, requiring no lashing equipment and designed for single-person installation.
Can I reuse a container liner? Single-use liners for food-grade or chemical cargo should not be reused. Heavy-duty reusable liners can return to service after passing a post-use inspection and being fully cleaned and dried.
What should I check before installing a container liner? Inspect for residue and odors from previous cargo, sharp protrusions on the floor and walls, moisture, and damaged D-rings or lashing points.
See how our products can improve your operations and drive your success.
Get in touch to find out how Codefine can support your business with tailored solutions and expert guidance.